• Skip to primary navigation
  • Skip to main content
  • Skip to primary sidebar
  • Home
  • DIY Projects
    • Homemade Bath and Body
    • Sewing - Fabric Crafts
    • Flower Crafts/Decor
    • Thrift Store/Vintage
  • Gardening
    • Flower Gardens
    • Container Gardening
    • Houseplants
    • Indoor Gardening
    • Landscaping
    • DIY Garden Art
  • Decorate
    • Spring Decor
    • Summer Decor
    • Fall Decor
    • Winter Decor
    • Home Decor Projects
  • Recipes
    • Breakfast Recipes
    • Lunch Recipes
    • Dinner Recipes
    • Dessert
    • Salad Recipes
    • Soups and Stews
    • Side Dish Recipes
    • Appetizers and Snacks
    • Healthy Recipes
  • Holidays
    • Valentine's Day
    • Easter
    • Mother's Day
    • Halloween
    • Thanksgiving
    • Christmas
Hearth and Vine
menu icon
go to homepage
  • About
  • DIY
    • ...Flower/Gardening Crafts
    • ... Bath and Body
    • ...Sewing/Fabric Crafts
    • ...Thrift Store/Upcycle
  • Gardening
    • ...Flower Gardens
    • ...Container Gardening
    • ...Indoor Gardening
    • ...DIY Garden Art
  • Decorate
    • ...Home Decor Projects
    • ...Spring Decor
    • ...Summer Decor
    • ...Fall Decor
    • ...Winter Decor
    • ...Room Makeovers
  • Recipes
    • ...Appetizers and Snacks
    • ...Dinner Recipes
    • ...Side Dish Recipes
    • ...Salad Recipes
    • ...Dessert
    • ...Drinks
  • Holidays
    • ...Valentine's Day
    • ...Easter
    • ...Mother's Day
    • ...Halloween
    • ...Thanksgiving
    • ...Christmas
  • Subscribe
  • Instagram
    • Facebook
    • Instagram
    • Pinterest
    • Twitter
  • subscribe
    search icon
    Homepage link
    • About
    • DIY
      • ...Flower/Gardening Crafts
      • ... Bath and Body
      • ...Sewing/Fabric Crafts
      • ...Thrift Store/Upcycle
    • Gardening
      • ...Flower Gardens
      • ...Container Gardening
      • ...Indoor Gardening
      • ...DIY Garden Art
    • Decorate
      • ...Home Decor Projects
      • ...Spring Decor
      • ...Summer Decor
      • ...Fall Decor
      • ...Winter Decor
      • ...Room Makeovers
    • Recipes
      • ...Appetizers and Snacks
      • ...Dinner Recipes
      • ...Side Dish Recipes
      • ...Salad Recipes
      • ...Dessert
      • ...Drinks
    • Holidays
      • ...Valentine's Day
      • ...Easter
      • ...Mother's Day
      • ...Halloween
      • ...Thanksgiving
      • ...Christmas
    • Subscribe
    • Instagram
    • Facebook
    • Instagram
    • Pinterest
    • Twitter
  • ×
    Home » DIY Projects

    How to Make a Twig Wreath with Branches from Your Yard

    by Patti Estep · Sep 13, 2023

    Jump to How-to Card
    Twig wreath image over the supplies including branches, pruners, wire and a wire wreath frame.

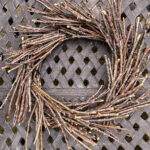
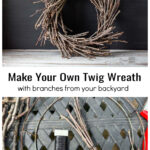
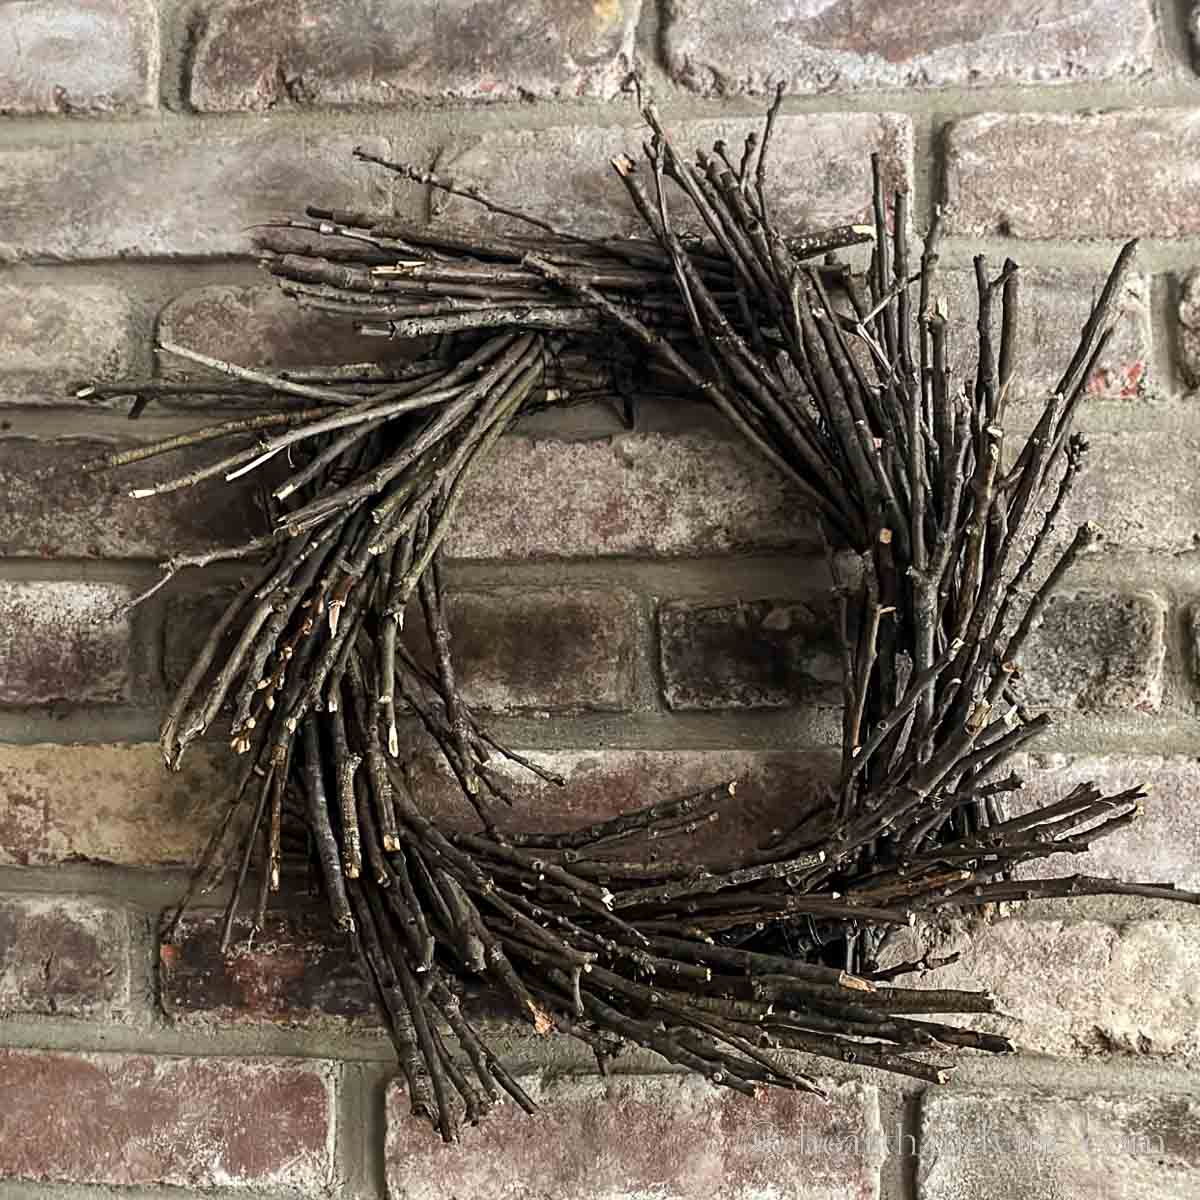
    Try this twig wreath DIY with branches collected from your backyard. It's a great base you can enjoy as is, or add other elements to create a beautiful wreath for any season.

    Handmade twig wreath hung on a brick wall.

    Here's another great nature craft that might cost you next to nothing to make. We happen to have a ton of oak trees behind our house and every time there's a storm we get many twigs and small branches in the yard. Perfect for making a pretty fall rustic wreath for my home decor.

    This post contains some affiliate links (that means if you make a purchase after clicking a link, there’s no additional cost to you, but I will earn a very small commission. ) i.e. as an Amazon Associate, I earn from qualifying purchases. Click here to read my full disclosure policy.
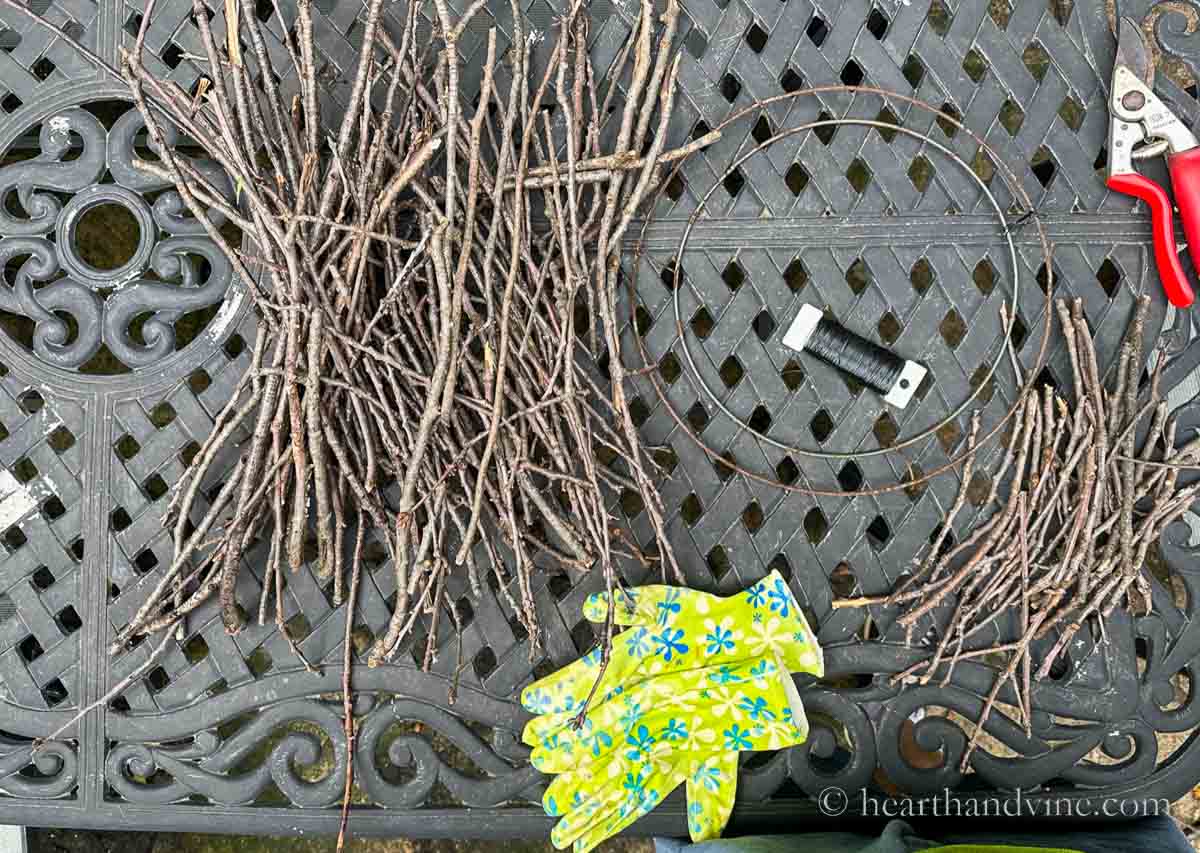
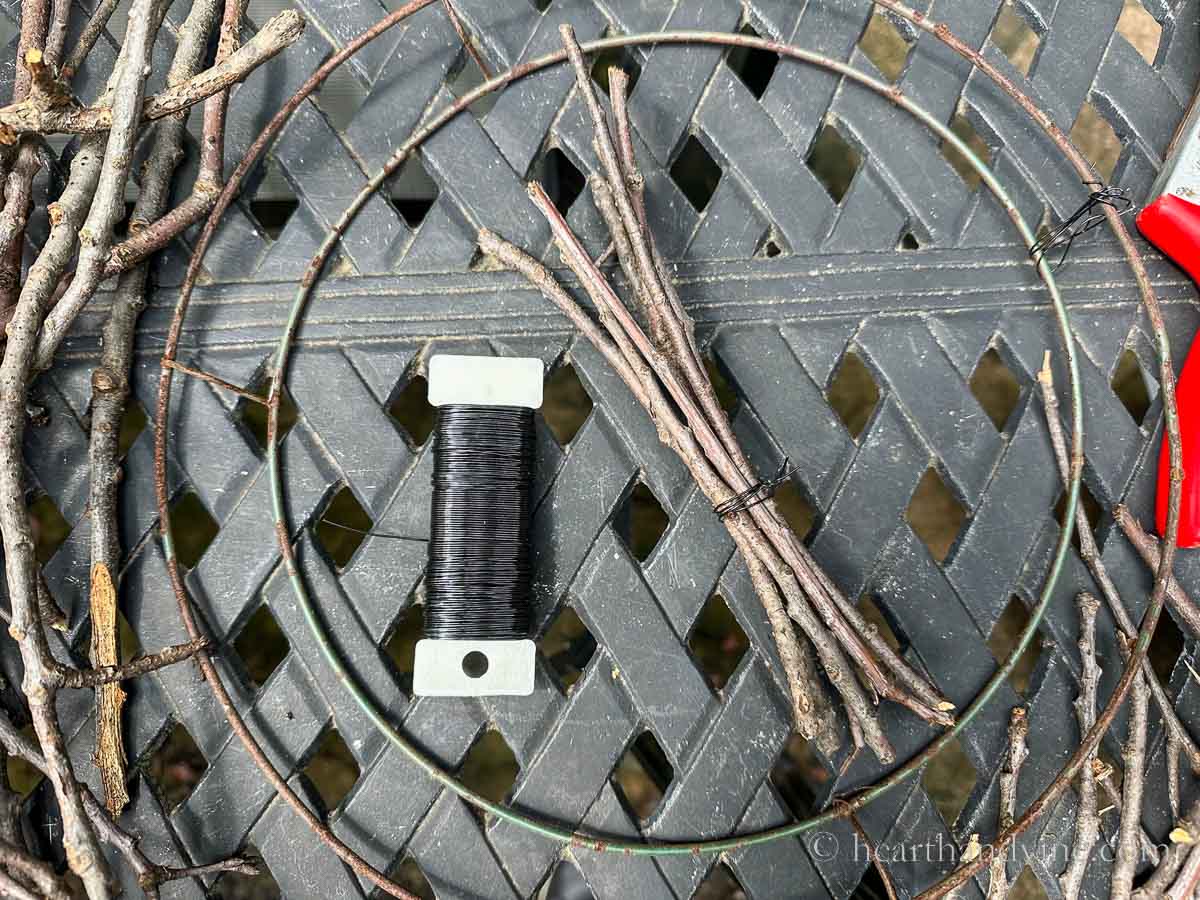
    Supplies for making a twig wreath including collected twigs or branches, floral wire in black and pruners.

    Supplies

    1. Twigs or thin branches. You could even use clippings from trees or shrubs you need to prune. Also, sometimes you can find birch or willow twigs for sale at Trader Joe's.
    2. A metal wreath frame. I used an old one but you can find these at the dollar store too.  Mine was about 10 inches in diameter resulting in about a 15 inch diameter wreath. If you want to make a large wreath, just use a larger base and create more bundles.
    3. A paddle of floral wire in black. Okay, I did buy this because all of my wire is green and it would show on the wreath but the black merely melts into the shadows. You could also try twine but I don't think that it will hold as well.
    A bundle of twigs wrapped together with black floral wire next to a paddle of wire.

    DIY Twig Wreath Tutorial

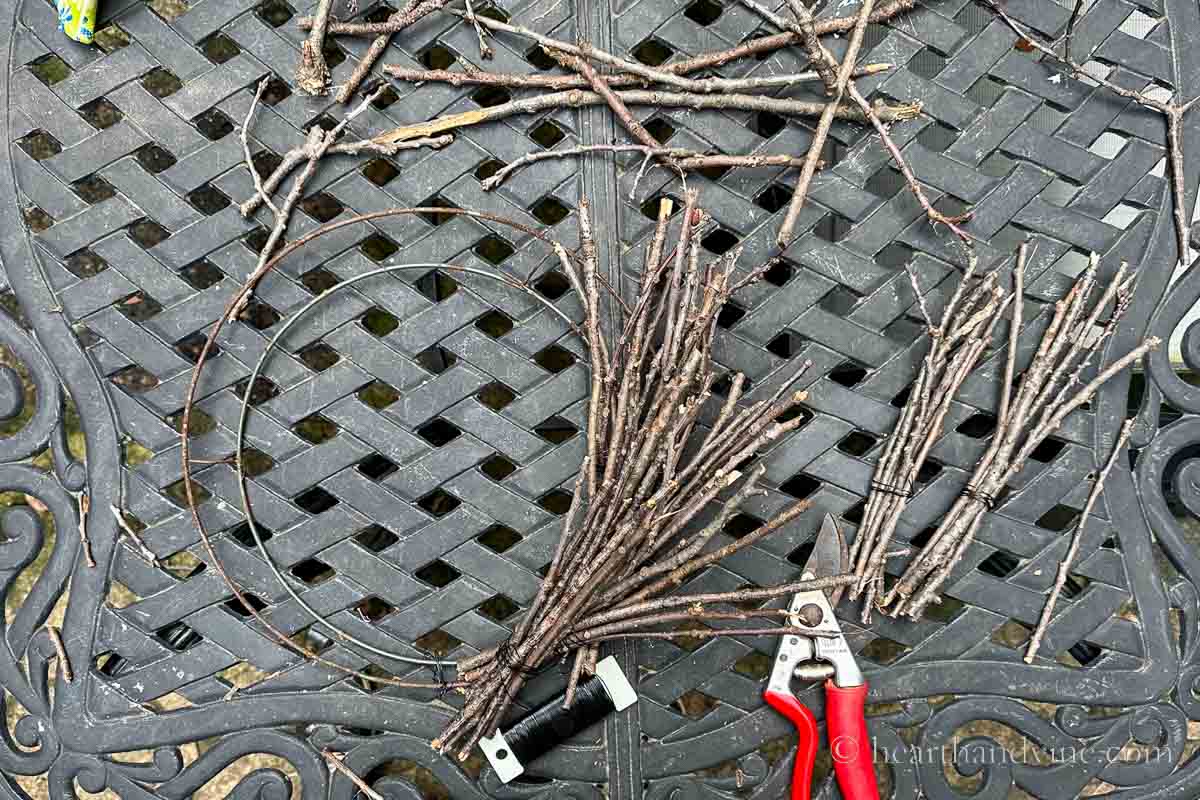
    1. Gather as many small thin twigs or branches as you can. Again, you could also use fresh branches from cuttings if you need to do some pruning.
    2. Cut them about 6-8 inches long.
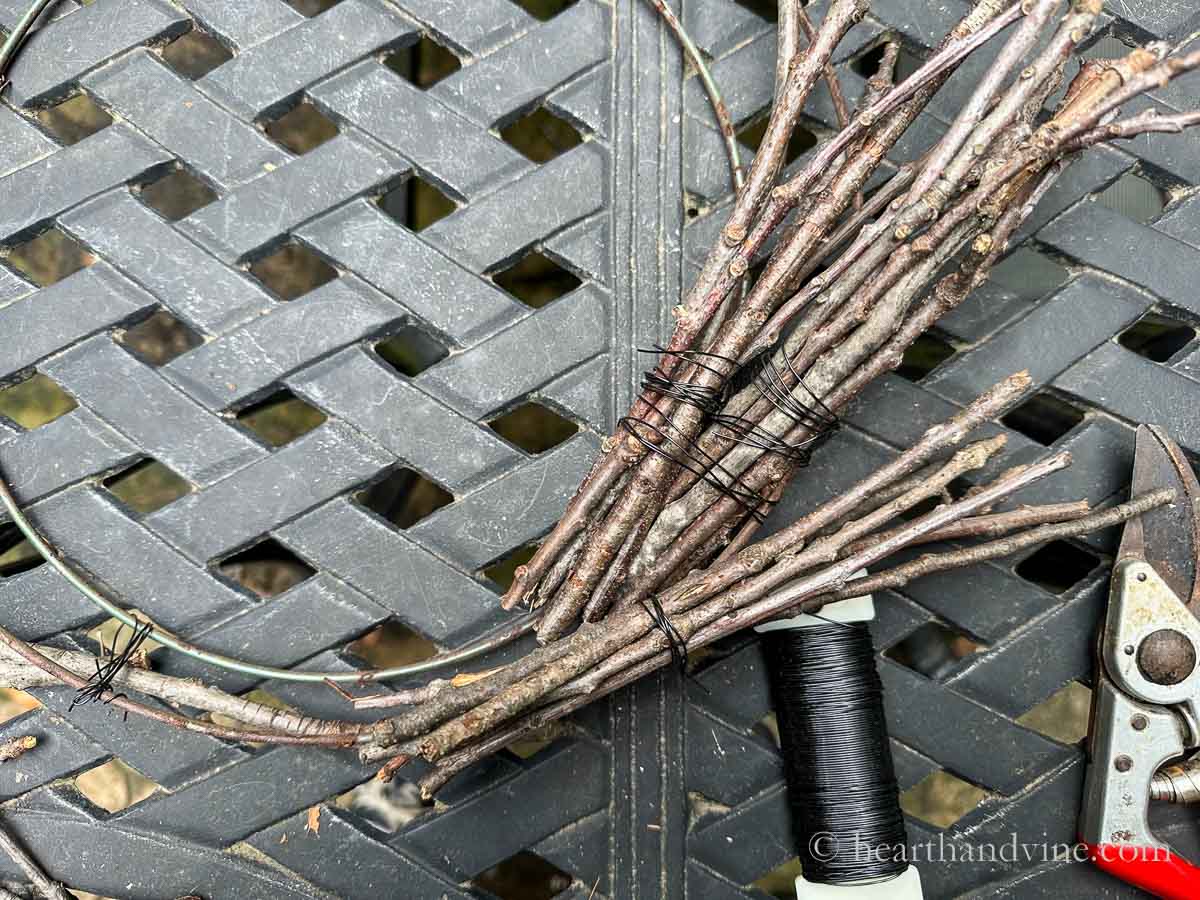
    3. Next bundle about 7 or 8 twigs together with floral wire.
    Several twig bundles with black floral wire.

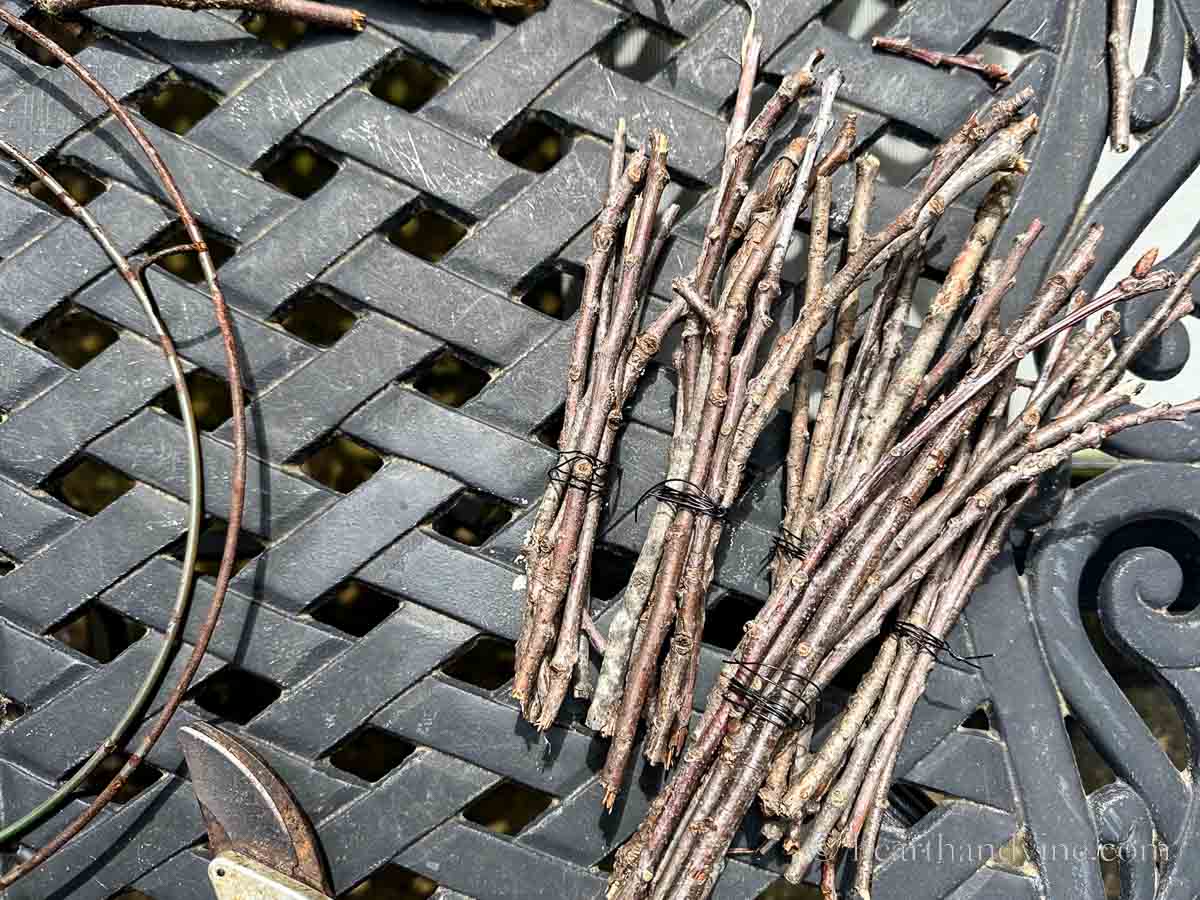
    I found as I worked that it looks better if you wrap the wire closer to the bottom third instead of the middle of the bundle.

    Bundles of twigs being wrapped onto a wire wreath frame.

    Attaching the Bundles to the Frame

    Start by tying the paddle of floral wire to the frame.

    Lay a bundle on the frame at a slight angle and wrap the floral wire around the bundle and the frame several times.

    Next, add a second bundle of twigs just to the left of the first bundle and wrap the wire around it.

    More bundles of twigs wired onto a wreath frame with a pair of pruners and a floral wire paddle in black.

    The third bundle is placed below the first bundle slightly overlapping and wired to the frame. The fourth bundle is placed just to the left of the third slightly overlapping the second bundle.

    The overlap helps to hide the wire used to hold the bundle of twigs together.

    The finished twig wreath on a wrought iron table.

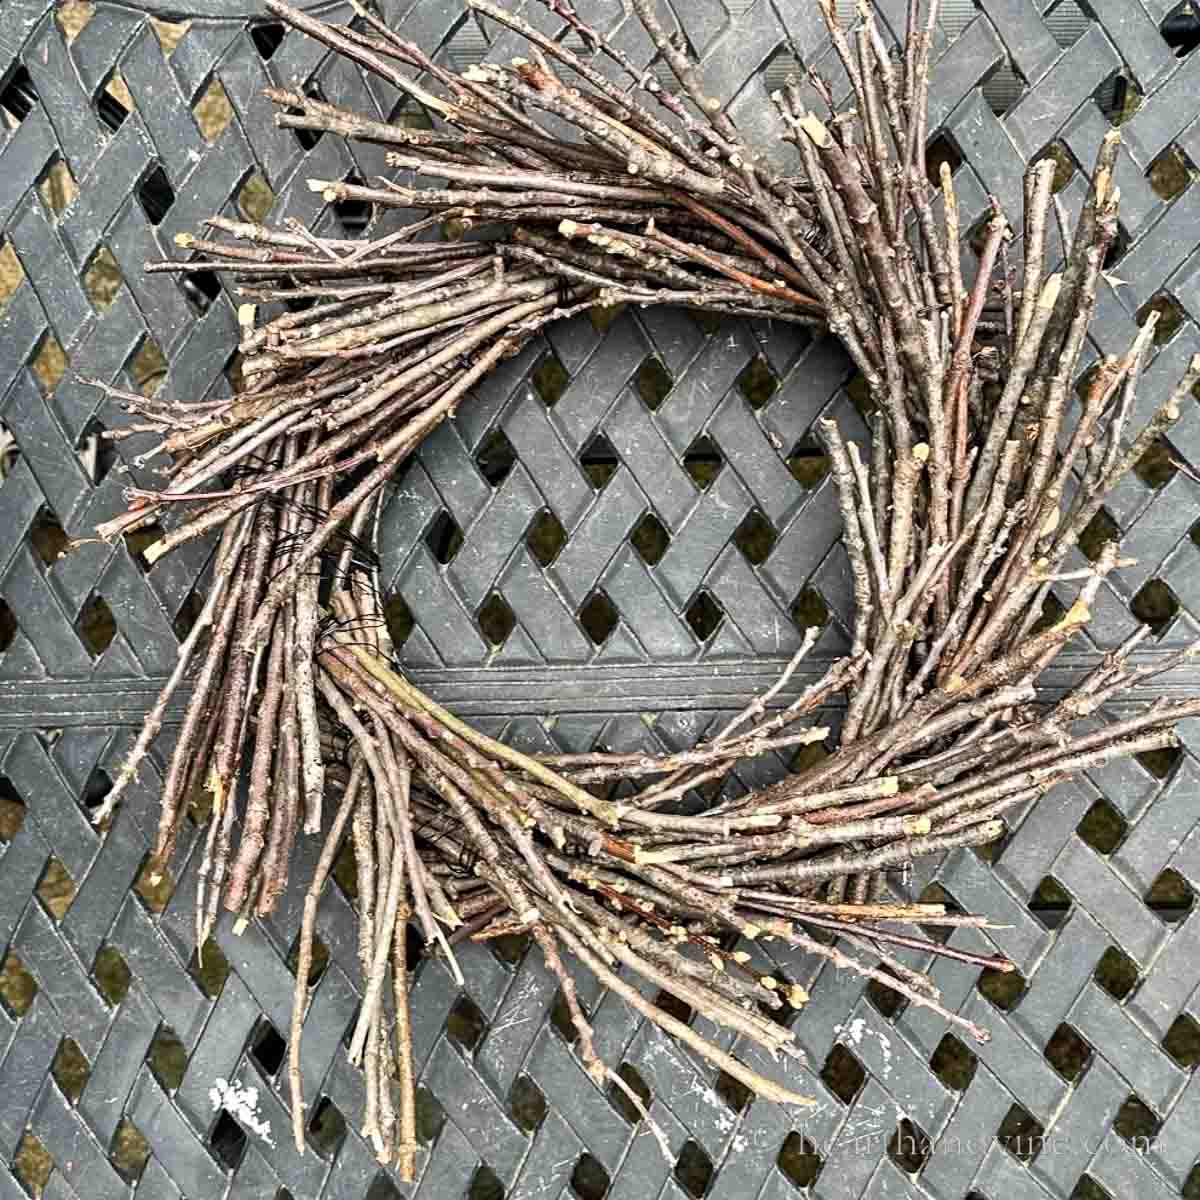
    Continue this process until you completely cover the wreath frame.

    Pretty neat, huh?

    You really don't notice the wire except on the one side. If you have this problem you could hot glue a few extra twigs on that spot or tie a bow there. I probably could have also placed one more bunch over that area.

    Twig wreath in the oven on foil and a pan.

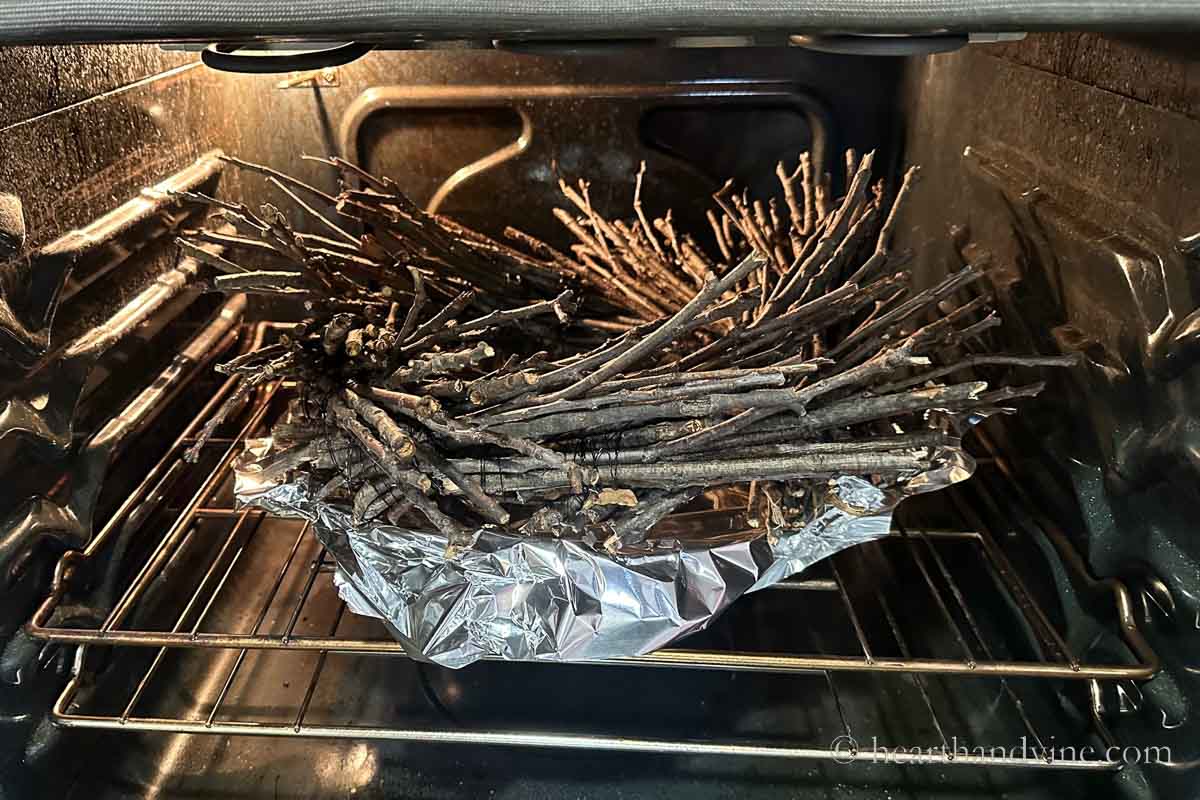
    Note: If you plan to hang this indoors place it in a 200 degree oven for 1 hour on a pan covered with foil to kill any pests or larvae.

    A natural twig wreath on a table with a black backdrop.

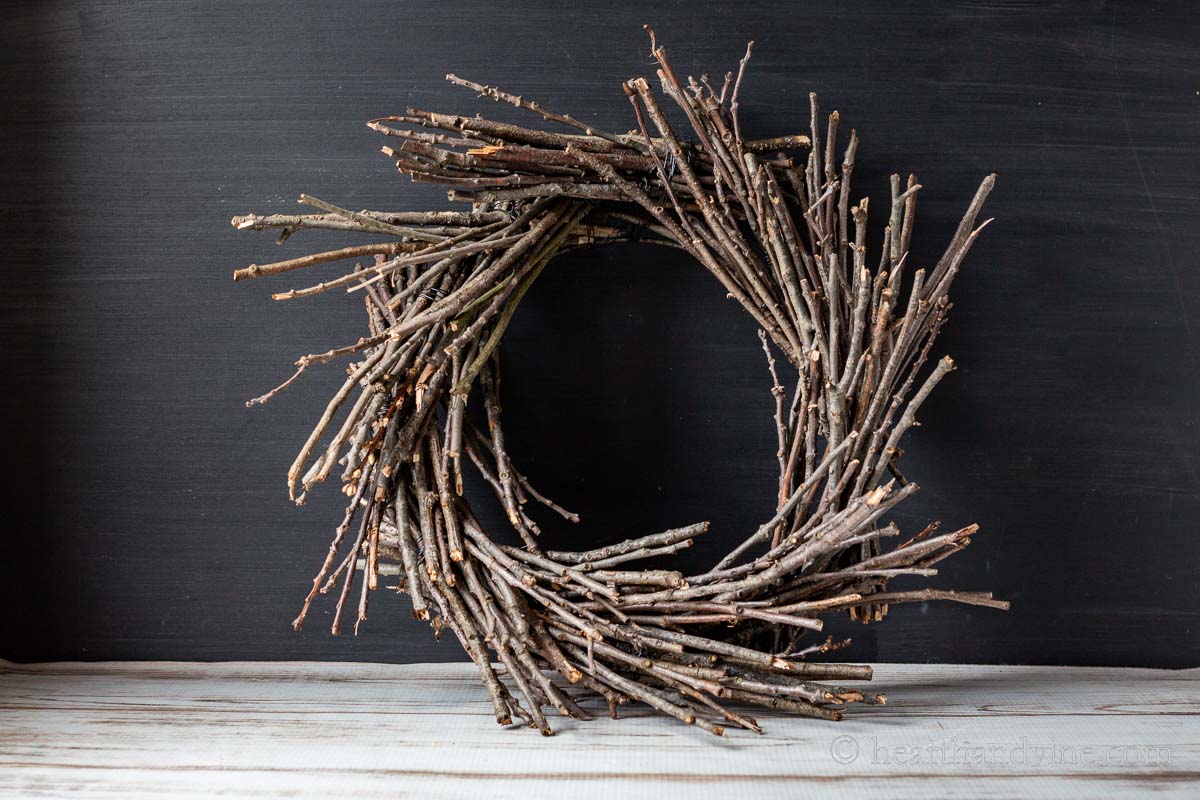
    I prefer the rustic look of this natural twig wreath. However, you could stick some floral picks or berries from your craft stash in between the twigs. You could also tie on a burlap bow or hot glue some beautiful dried flowers as accent pieces.

    Don't care for rustic? Make it modern with white spray paint and/or glitter. The choice is yours.

    Patti signature

    More Projects Using Twigs & Branches

    • DIY Twig Vase
    • Twig Christmas Trees
    • DIY Branch Christmas Tree
    • DIY Branch Garden Trellis
    A twig wreath hanging on a brick wall.
    Handmade twig wreath hung on a brick wall.
    Print

    Twig Wreath DIY

    Learn how to make make a rustic twig wreath as a base for real or faux decorations or just hang it as is on your front door or anywhere in the home.
    Active Time2 hours hrs
    Baking Time1 hour hr
    Total Time3 hours hrs
    Yield: 1

    Equipment

    • 1 pair of pruners or heavy duty scissors

    Materials

    • many thin twigs or branches from the yard
    • 1 wire wreath form
    • floral wire paddle in black

    Instructions

    • Gather branches from the yard.
    • Strip any leaves or smaller branches from the sides.
    • Cut or break the branches into about 8 inch lengths choosing straight sections.
    • Bundle about 6-8 branches and wrap black wire around the bottom third to hold them together.
    • Attach the black florist wire paddle to the wreath frame.
    • Start laying a bundle on the frame at a slight angle and wrap the wire around it and the frame several times.
    • Place another bundle next to the first one just to the left and continue wrapping wire around the new bundle to secure it to the frame.
    • Next, add a third bundle below the first bundle covering the wired section and use the wire paddle again to secure it by wrapping the wire around the bundle and frame several times.
    • Add a fourth bundle just inside the 3rd bundle the same way.
    • Continue adding two bundles overlapping the bundles above until you fill the frame.
    • If you plan to hang this indoors place it in a 200 degree oven for 1 hour on a pan covered with foil to kill any pests or larvae.

    Notes

    Try to keep the branches or twigs in similar thickness or diameter for an overall even look.
    Using black wire helps hide the wire on the finished product. However, feel free to hot glue a couple of extra twigs on top of the wire to completely hide it from view.
    I think this twig wreath looks great on its own. However, you can add anything you like to the twig wreath to fit the season or give it a year round look. 
    Add a ribbon, faux flowers, berries, or pine cones. Add dried flowers or decorative grasses. You can get away with sticking many stems into the wreath and removing them for the next season or hot glue items on for a more permanent look.
    Tried this project?Tag @hearthnvine on Instagram
    « Bringing Plants Indoors: 5 Tips for Winter Care
    Oreo Homemade Ice Cream without an Ice Cream Maker »

    About Patti Estep

    Patti is the creator of Hearth and Vine, a home and garden blog filled with projects to inspire your creative side. She loves crafting, gardening, decorating and entertaining at her home in Pennsylvania. When she is not working on a project at home or searching for treasures at nurseries and thrift stores with her girlfriends, you’ll probably find her with family and friends, at a restaurant, or home party enjoying new and different food adventures.

    Reader Interactions

    Leave a Reply Cancel reply

    Your email address will not be published. Required fields are marked *

    Recipe Rating


    Primary Sidebar

    Patti Estep Profile Picture

    Hi!

    I'm Patti

    Join me to create lots of fun DIY projects, including crafts, gardening, home decor, and tasty recipes

    More about me

    Popular Posts

    • Pressed flower are in two dark frames.
      DIY Pressed Flower Art
    • Pilea peperomioides
      Pilea Plant - The Pass It On Friendship Plant
    • Serving of cream of crab soup in a red bowl.
      Easy Cream of Crab Soup
    • Small indoor water fountain
      DIY Indoor Water Fountain
    • Chicken oscar on a plate
      Easy Chicken Oscar Recipe Made with Hollandaise Sauce
    • Fabric bowl covers in 3 prints
      How to Make Fabric Bowl Covers

    Footer

    ^ back to top

    About
    Contact
    Privacy Policy
    Disclosure Policy
    Terms of Service

    Sign Up Here!
    for our
    newsletter &
    special offers

    Follow Me

    facebook
    Pinterest
    instagram

    As an Amazon Associate, I earn from qualifying purchases. i.e. as an Amazon Associate, I earn from qualifying purchases.

    Copyright © 2026 Hearth and Vine

    Rate This Recipe

    Your vote:


    A rating is required
    A name is required
    An email is required