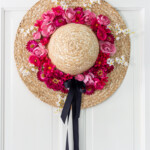
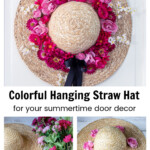

See how easily you can put together this bright and cheerful summer wreath to adorn your front door this summer. Just a few basic supplies come together to create a fun straw hat wreath that will greet everyone who comes to your door.
Summer is upon us so that means it's time for a new front door wreath. One of my favorite things to make in the decorating realm is something for the front door. Often I use natural flowers and grapevine wreaths but I also like to make some with artificial flowers like today's straw hat wreath.
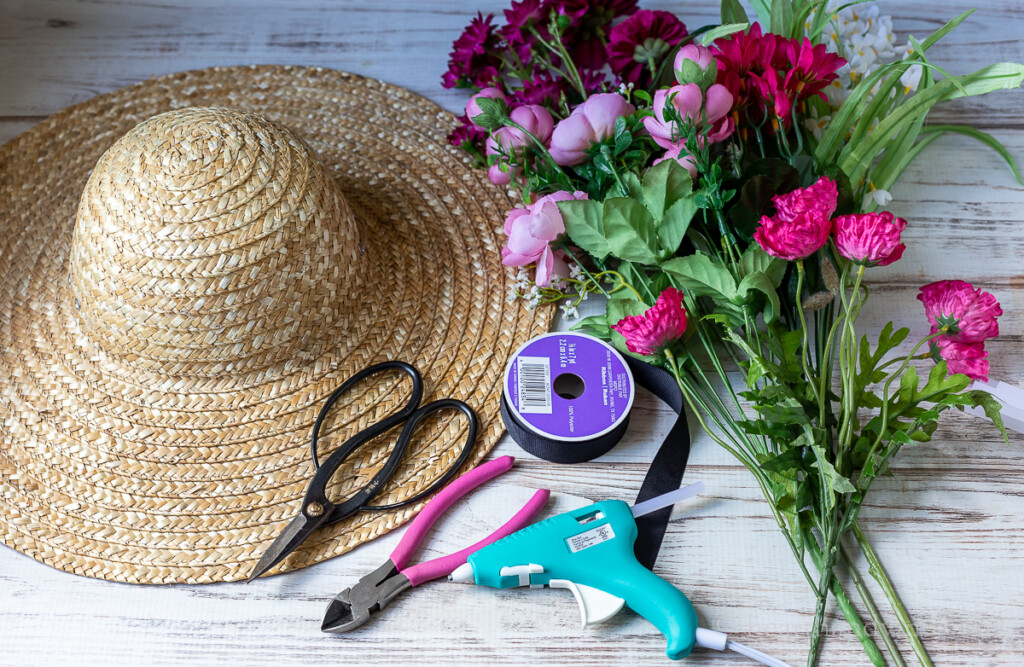
You can find very inexpensive straw hats at the craft store and sometimes at the dollar store. Maybe you have an old one lying around that you could use. Once you get a hat all you need is some flowers, ribbon, and a hot glue gun.
How to Hang a Straw Hat on the Door
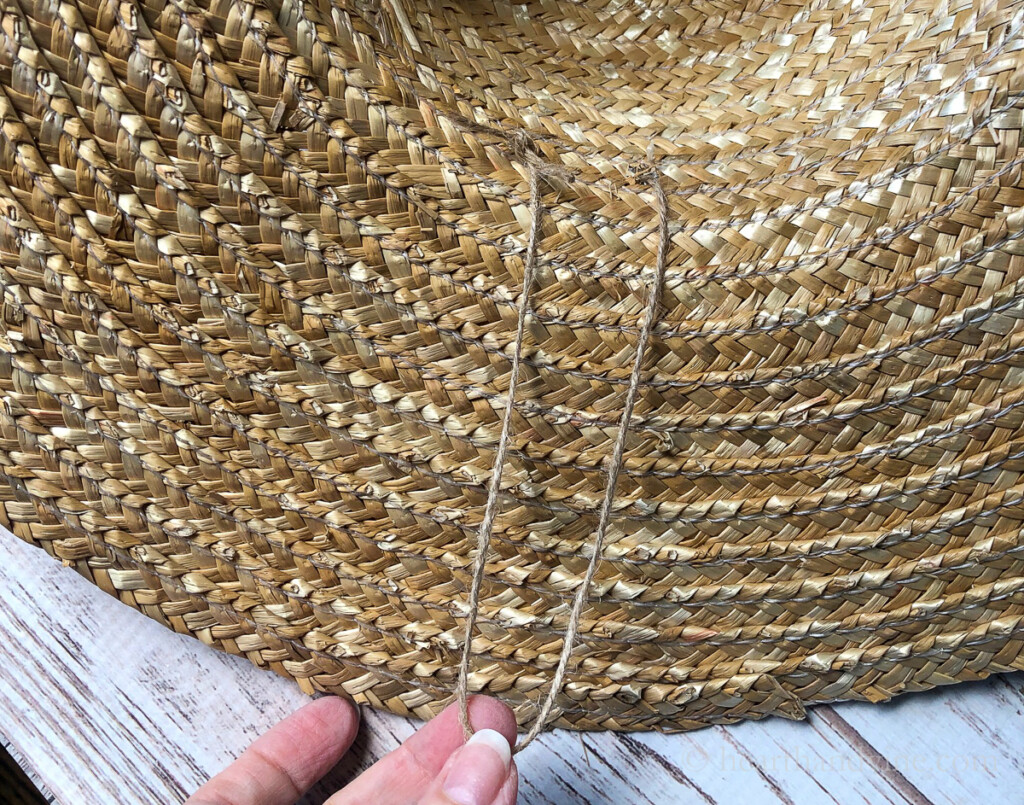
One more thing. You'll need to make a simple hanger to hang the hat on the door. I used a piece of twine and thread it through the holes in the hat. Make it long enough to hang where you want it. Then slide the knot through the holes to the inside so that it doesn't show.
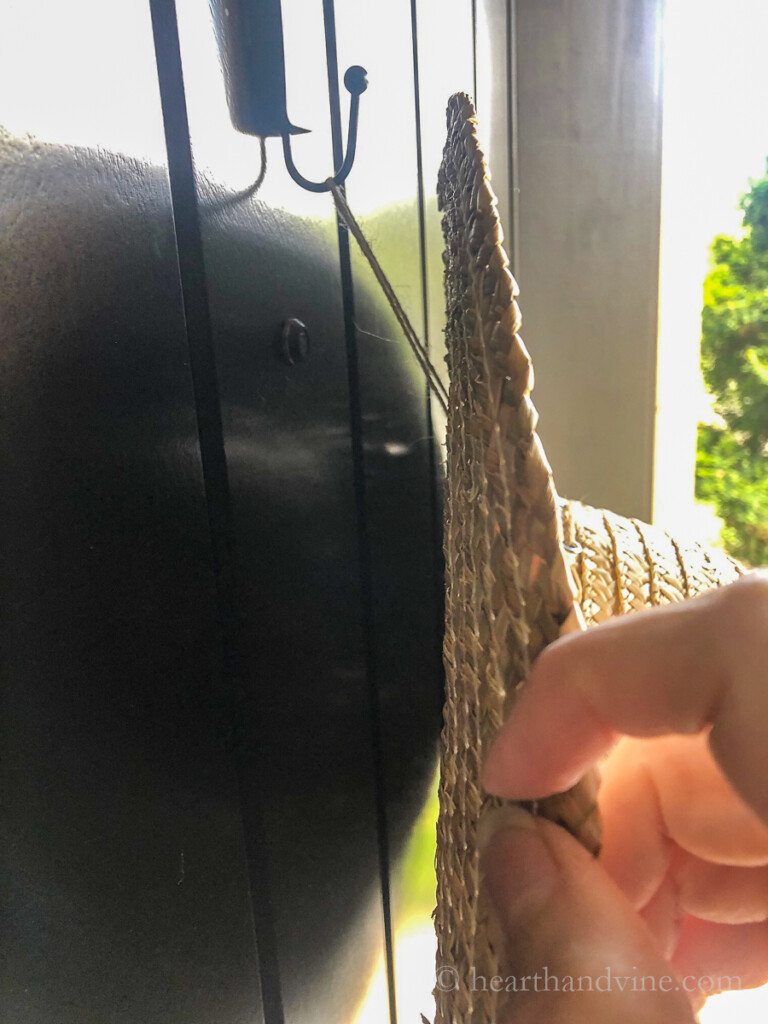
Then hang it on a wreath hook from underneath the hat.

Decorating the Hat
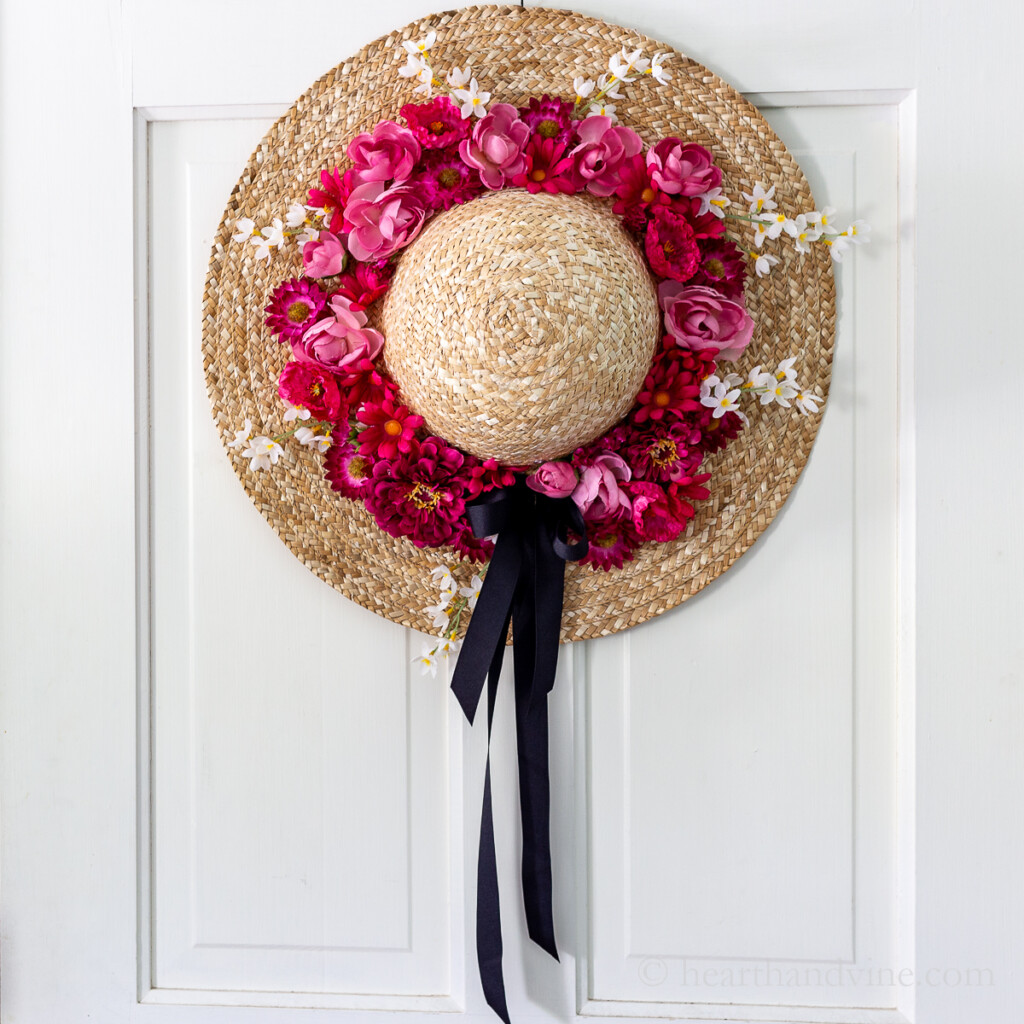
Now for the decoration. I wanted to use bright raspberry pinks for this festive summer wreath. So I picked up a few bushes at the craft store. For a little contrast and a little lightness, I also used one bunch of little white daisies.
To prep, cut off the tops of the flowers with wire cutters. Then cut the daisies into 3-4 inch lengths. Don't throw away the rest of the material such as buds or leaves. You never know when you might use it. In fact, you may want to tuck in a few leaves with the flowers.
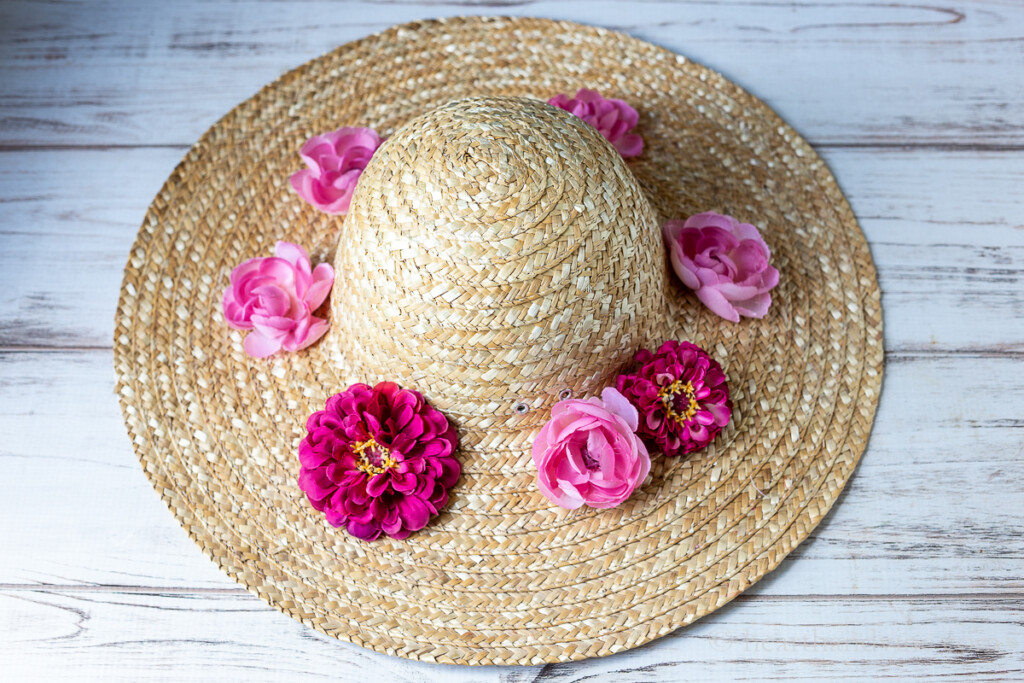
As with so many of my floral projects, start with the largest items first. Simply add a little hot glue to the bottom and set it in place on the brim.
Then start adding in smaller flowers and buds, leaving a little bare opening across from the hanger to add a bow.
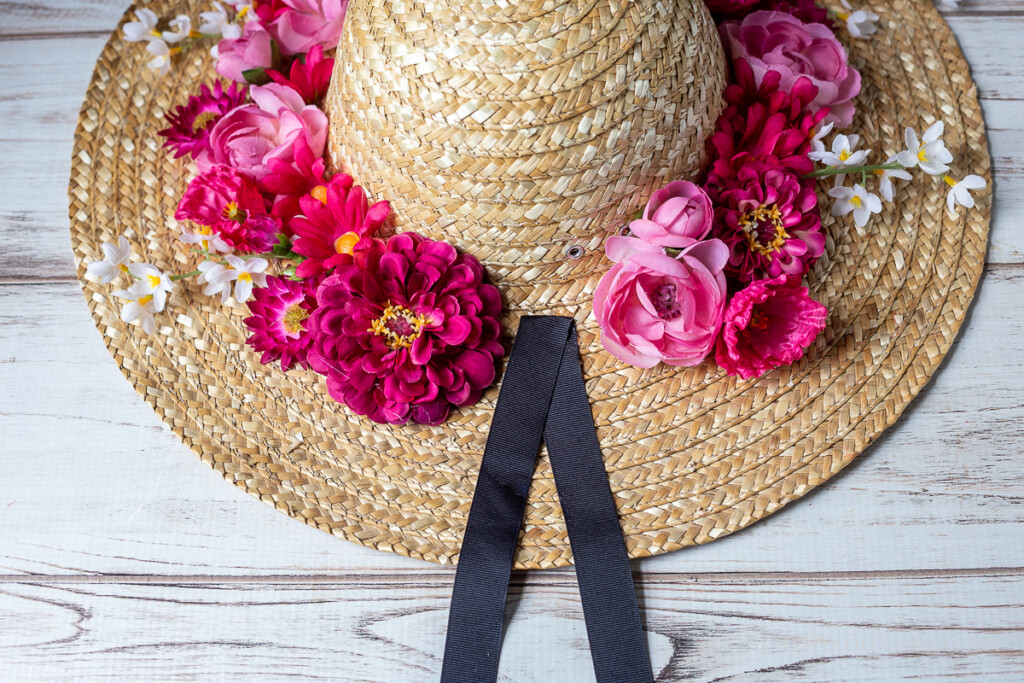
Finish with the daisies and any leaves that you want to add.
Tip: It's helpful to prop up the hat so you can see what it will look like on the door while you're working. You might even want to remove a picture from the wall and hang it there to see where you may need to add a few flowers.
Adding a Bow
Once you have filled in all the flowers, it's time to make a bow.
Start with a length of ribbon folded in half a little on the long side, about 20 inches. Pull it apart slightly and hot glue the top to the hat as shown above.

Next, make a bow with tails that are smaller than the ones you just glued on the hat about 8 inches.
Glue the bow directly on top of the ribbon and your straw hat summer wreath is complete.
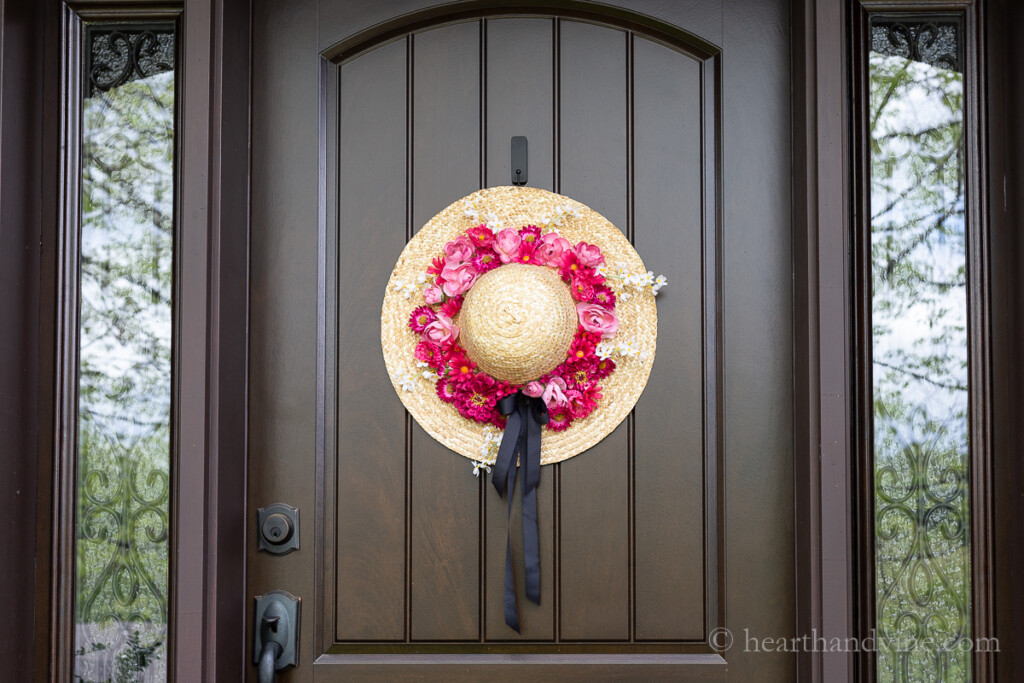
The beachiness of a straw hat and the bright raspberry reds and pinks scream summer to me. This easy project will be good for several months and then it will be time to create something new for the fall.

More Summer Front Door Wreaths
DIY Summer Wreath from a Straw Hat
Equipment
- Scissors
- Glue gun
Materials
- Wide brim straw hat
- Several artificial flowers in varying size and shape
- 1 inch grosgrain black ribbon
- floral wire
- hot glue
Instructions
- Cut off flower tops from stems.
- For small sprigs of flowers cut them around 2-3 inches
- Prepare a hanger by threading twine or jute through the holes in the hat.
- Determine the length you want and cut the twine.
- Tie a knot and then slip the knot through the holes to the underside so that the knot will not show when hanging.
- Glue flowers all around the base of the hat, leaving a spot opposite from the hanger open for a bow.
- Start with the largest flowers first.
- Continue to glue smaller flowers around the rim.
- Add the sprigs of the smallest flowers on last.
- Fold a lenght of ribbon about 20 inches long in half and glue the top to the opening on the hat.
- Make a bow with two smaller tails using the floral wire.
- Glue the bow on top of the black ribbon tails.
- Hang and enjoy.
Carole West
This is so pretty and I like how you pulled the string through for a simple hanger. Great tip and those zinnias almost look real.
Patti Estep
Thanks Carole. I agree some of the faux flowers you can buy at the craft store look so real these days. Thanks for stopping by.
Rebecca Payne
Awesome! Thank you for sharing.
Patti Estep
Glad you like it Rebecca!