This bathroom vanity makeover was completed by using leftover paint and repurposed hardware to create a clean modern look.
It's week two of the $100 Room Challenge.
If this is your first time here, Welcome!
You can read all about the origin of this bathroom makeover (or jump ahead) and the $100 room challenge here:
Intro and Before Pics - Week 1
Bathroom Vanity Makeover - Week 2
How to Make a Window Cornice - Week 3
Bathroom Vanity Makeover
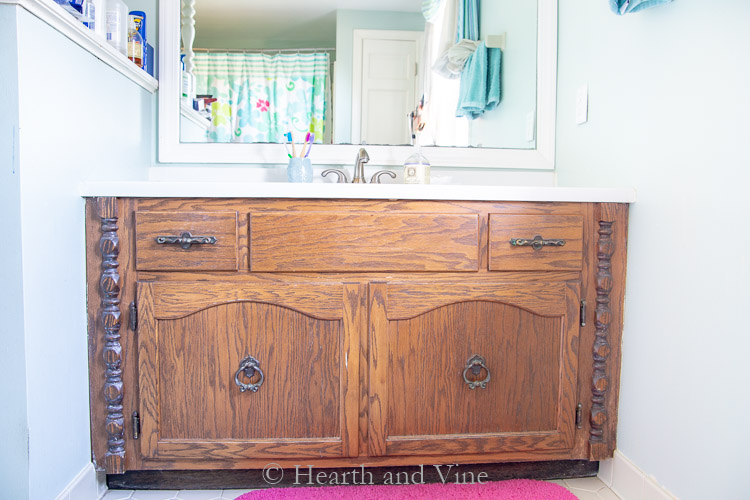
I couldn't wait to tackle this ugly vanity. To be honest I'm a little embarrassed that I haven't done anything to it before now. But, you know how it is. There's always something. Time, money, and life just gets in the way.
This is precisely why I have joined Erin from Lemons, Lavender, and Laundry each January for the challenge.
It's the perfect way to update a neglected room without having to break the bank.

Create New Hardware
The first thing I did on this bathroom vanity makeover was to remove all the hardware.
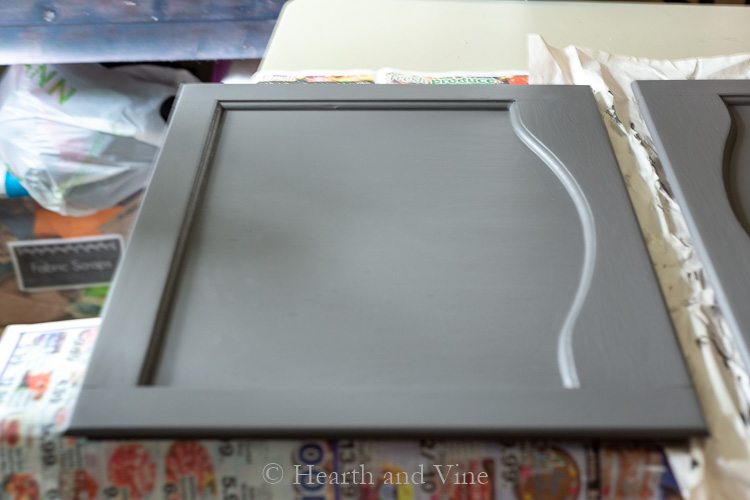
Then I used a little silver rub and buff on the old hardware from my kitchen update, to create shiny new hardware for the vanity. I love this stuff and have used it on many projects. Mostly for mirror frames that were wooden and I wanted a metal look. It comes in several colors and is super easy to use.
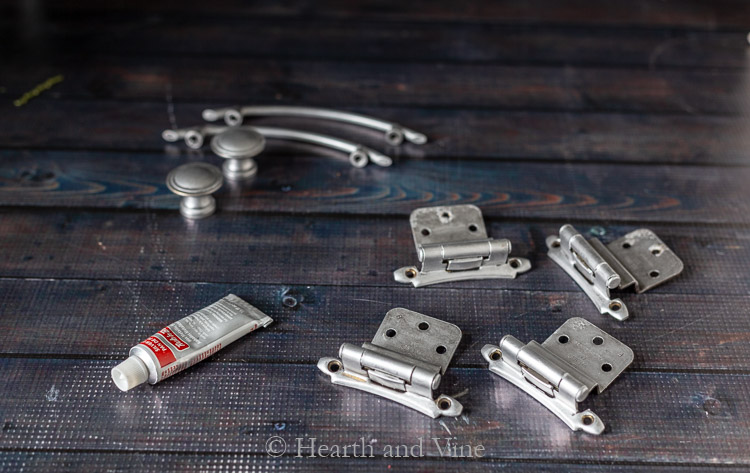
I even used it on the hinges.
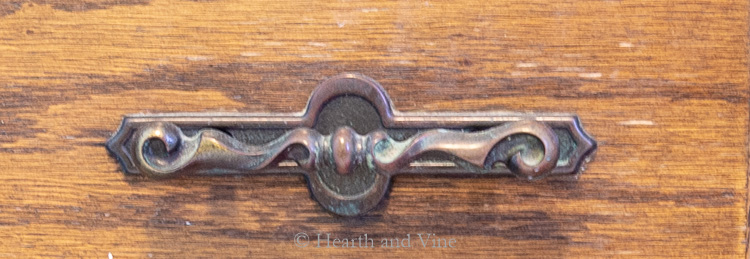
However, I wasn't completely happy with the old handles from the kitchen. They just didn't seem substantial enough, so I took apart the drawer pulls on the original vanity. Then I used the top part, (coated with more silver rub n buff), as the door handles.
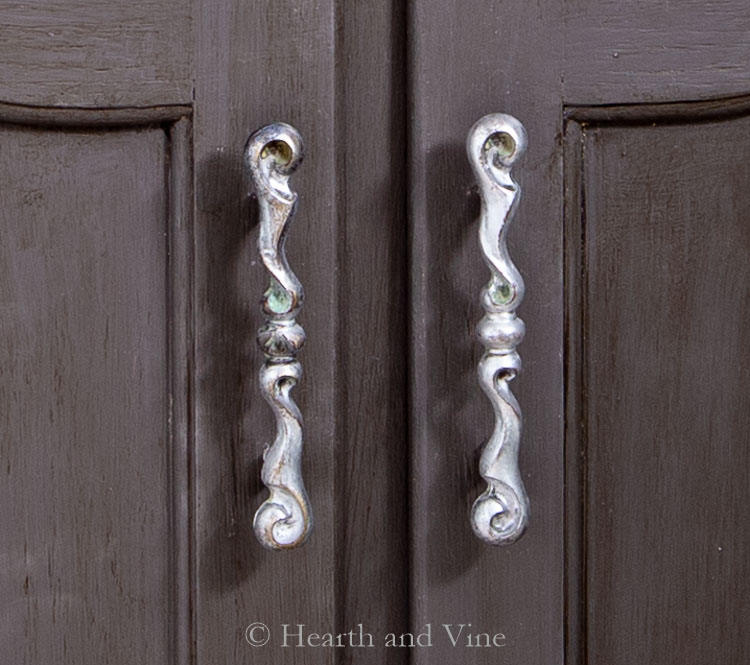
I'm super happy with how they turned out.
Next, we removed outdated wood trim on the sides. I was worried that it would be hard to remove but it was only nailed into the base. We filled in all the holes with wood putty and the next day sanded everything and gave it a coat of primer.
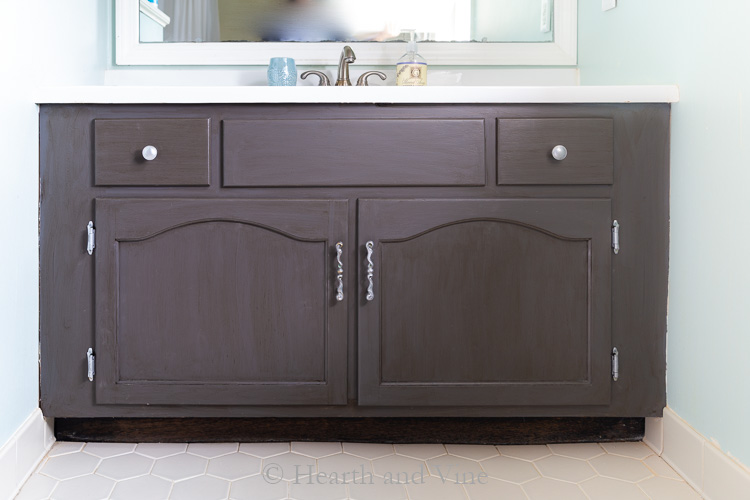
Then I painted the vanity with the same gray floor paint I used for our porch makeover. The can states that this paint can be used for interior as well as exterior, so I went for it.
However, it looked a bit flat so I added some dark glaze that we had in the basement from the old oak cabinet makeover in our family room.
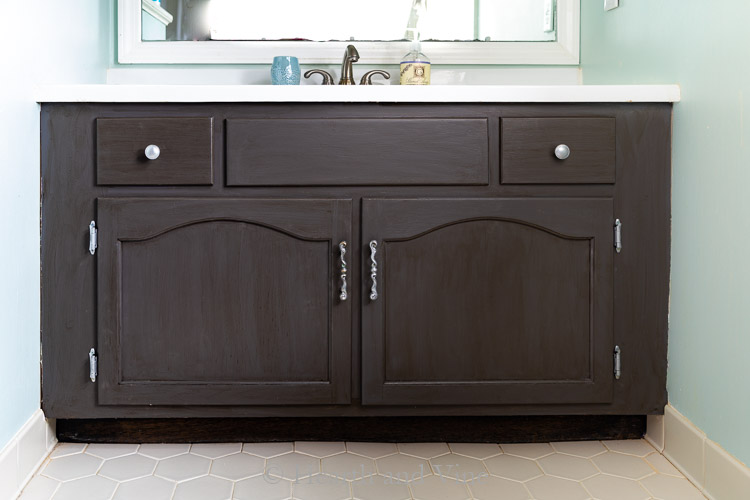
I'm thrilled with how well this bathroom vanity makeover turned out. I know, anything would have been an improvement.
Project Costs:
- Hardware - $0
- Silver Rub n Buff - $0
- Paint and Glaze - $0
So far I haven't spent a dime! Everything I used was already in the house. Next week I plan on tackling the window treatment and that will definitely cost me some funds.
Come back and see what happens next, and don't forget to check out the progress from everyone in the group below.


Erin - Lemons, Lavender, & Laundry
Oh wow!!! That is such a great transformation, and I am SO impressed that you were able to do it without spending any money!!!
Patti Estep
Thanks Erin, but don't worry it's coming. The challenge is $100 so I'll spend it all. Another reason why I like a challenge limit. Otherwise, who knows how much more I would have spent.
Leigh
Patti,
What a great solution for your vanity! Looks great!
Patti Estep
Thanks Leigh. Being on a budget is a great way to think outside of the box.
Sherry
Holy cow, Patti, I can't believe how great this vanity looks now. I agree with the other commenter that this may be one of your best projects!
Patti Estep
Thanks Sherry. We had a lot to work with. 🙂
Joy
The vanity makeover looks gorgeous! Love that you had everything on hand. Excited to see your completed space.
Patti Estep
Thanks Joy. This is the best time to tackle a room. Feels so good after the holiday chaos.
Rebecca | R&R at home
Wow! Already such a difference made!
Patti Estep
Thanks Rebecca. It was so worth it. Why did I wait so long? 🙂
Angie @ Postcards from the Ridge
Wow, Patti! This doesn't even look like the same piece! Great work, and I love the paint color. Can't wait to see how the room evolves.
Patti Estep
Thanks Angie. This is what I love about these challenges. It forces you to tackle long overdue projects. Well, at least that's true for me. 🙂
Plus it's so inspiring to see what everyone else dreams up.
Jenn Meyers
Oh wow, I thought you had replaced it! This is a huge transformation! Great job!
Patti Estep
LOL. Thanks Jenn. That is so sweet of you to say. I am happy with the way it turned out. Should have done this years ago.
Julie
Woot! Not only an improvement, but it looks just lovely! Love the color of the vanity next to the blue walls! Perfect! Question, does the Rub N Buff dry, so that it doesn't rub off with use?
Patti Estep
Thank you Julie. I've used the rub n buff on things like mirrors and picture frames for years and it doesn't fade or disappear. I've also tried it on the handles of my sewing desk last year and it hasn't changed. However, I guess it's possible that it might not endure a piece that is handled on a daily basis. But, since you only use the tiniest amount you can always re-apply it.
Kristen
Looks great Patti! I love that you reused the top part of the hardware for the new door pulls!
Patti Estep
Thanks Kristen. As I'm sure you know $100 doesn't go very far when making over a room so we have to get creative. I'm at the point where I almost never throw anything out. Pretty soon they are going to turn me into the hoarder police.
Beth
Looks so good! What a fantastic transformation!
Patti Estep
Thanks Beth. I obviously had a lot to work with. 🙂
Marly @ A Brick Home
Such a great transformation, Patti! Your updated hardware looks great. And the fact that you haven't spent a dime is pretty much amazing.
-Marly @ A Brick Home
Patti Estep
Thanks Marly. It's a good thing because I'm still trying to figure out how I can replace the curtain and rugs without spending a fortune.
Nicki
It's amazing what a little paint can do! Sooo much better!
Patti Estep
Thanks Nicki. Paint can cover a myriad of problems for sure.
Christine
Oh my goodness, Patti! What a transformation! I LOVE the color you chose and the WOW just WOW on the hardware! I've never heard of the product you used but I'm definitely going to have to get some! Kudos to you for not spending a dime yet! Can't wait to see what you decide on for the window treatment!
Patti Estep
Thanks Christine. I wasn't sure if porch paint was going to work but so far it has worked out and I'm been using the rub n buff stuff for years. Never on hardware but since this bathroom doesn't get used much I feel like it will be long lasting.
Carole
Patti - this is amazing and I love how the hardware turned out. It's one of your best makeover pieces yet and I love that you used materials you already had to keep the expense to zero. Brilliant - using up what you already have.
Patti Estep
Thanks Carole. I will be sure to spend the entire $100 I'm sure but I'm glad that this one was free to me. I like the way it turned out but really anything would have been an improvement.