Learn how to make a mini pouf ornament with pretty fabric to brighten your tree. Basic sewing skills are all you need.
This Mini Pouf Ornament Tutorial does require some basic sewing skills, but after you make one you can whip them up pretty quickly.
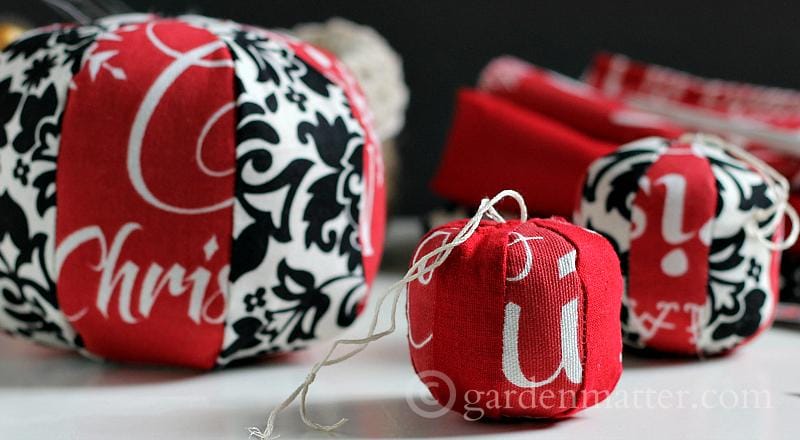
I've always admired the floor cushions, or poufs, that I've seen online in beautiful designer fabric, and thought they would make a pretty Christmas tree ornament. So I enlisted my husband to help me scale down a floor pouf pattern and I ended up with this.
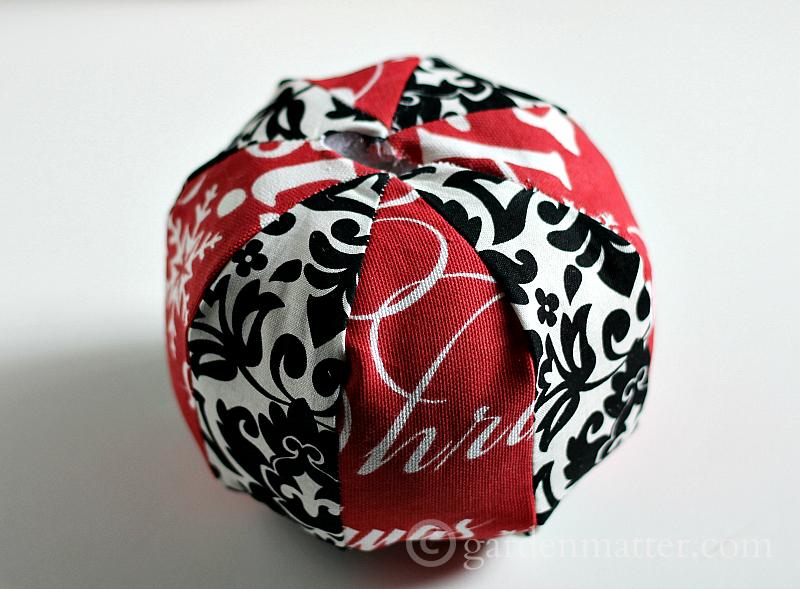
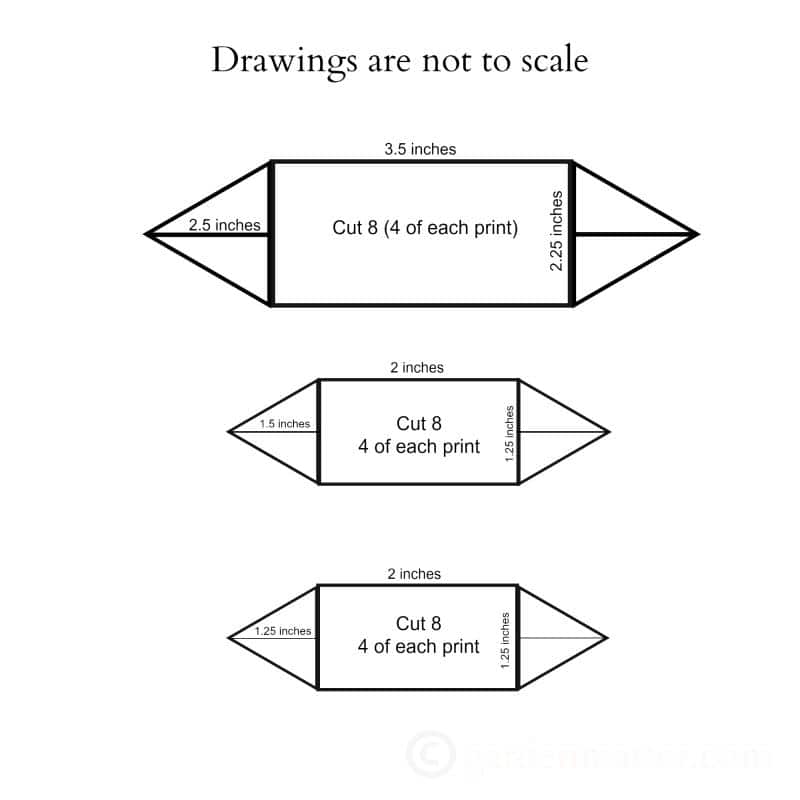
I don't think you can tell from the picture, but this ornament is about the size of a grapefruit. It looked like the pouf, only way too big for an ornament. By the time I realized this my husband was unavailable, so I was on my own to scale the pattern once more. With trial and error, I ended up with two smaller sizes, and have included all three templates for you to choose from.
Here's the tutorial:
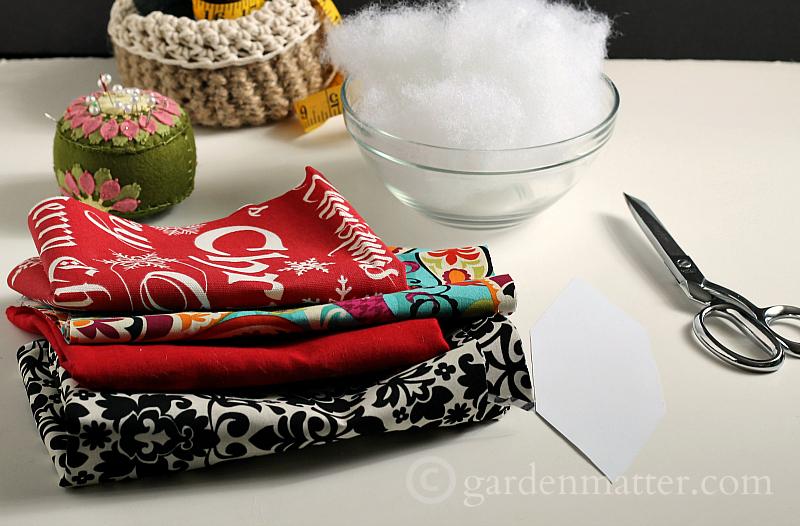
The Materials
Two complimentary cotton fabrics - you can use solids if you want
Polyfill or other soft filler
Embroidery thread or thin ribbon to hang the ornament
Pattern template - below
The Process
Step 1
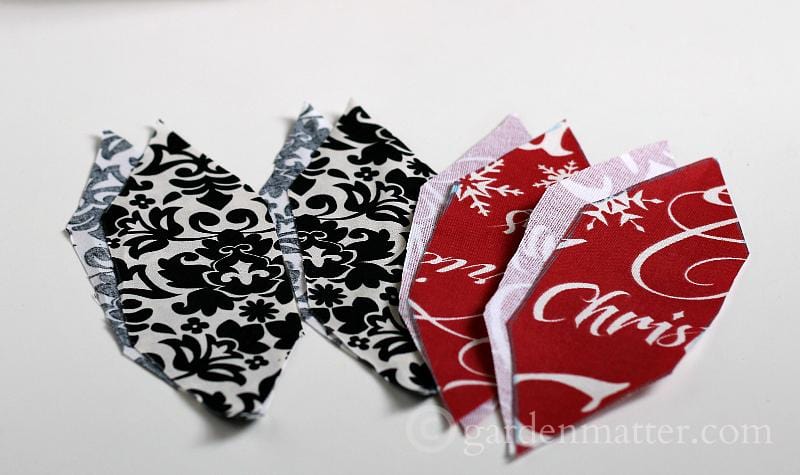
The following images are from the extra-large ball so you can easily see the steps.
Draw the template of your choice (above) on some stiff paper like card stock and cut it out. Trace onto your fabric. Cut 4 pieces of each fabric, a total of eight.
Step 2
With right sides together, join one piece of each fabric to the opposite, and sew along one side, pivoting at the corners.
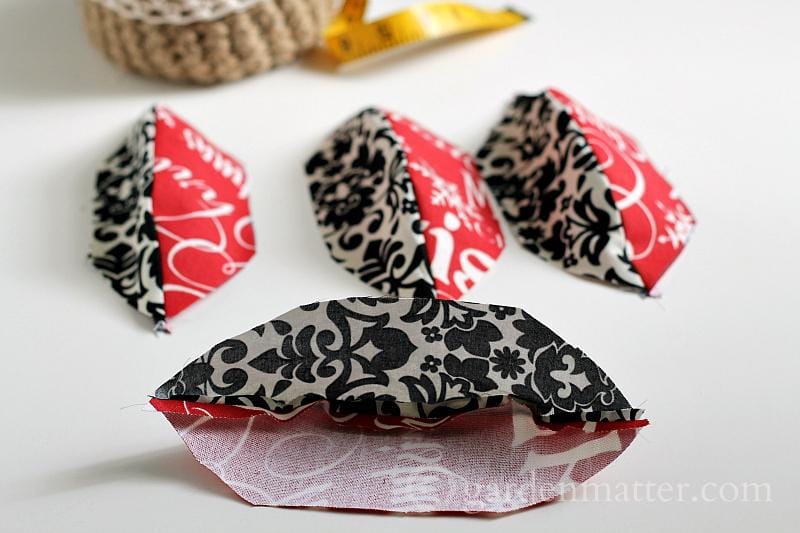
Step 3
Next take two pieces, with right sides together, making sure that the same fabric pieces are not matched up, and sew along one side again. You will now have two pieces that look like little bowls.

Step 4
Turn one piece inside out and nest it into the other so that the right sides are together. Pin, matching seams, and corners. Sew together leaving a small opening at one of the seams about 1.5 inches wide.

Step 5
Turn right side out and stuff with poly-fil or other stuffing material. Hand stitch the opening closed and sew a loop of embroidery thread at the top to hang.

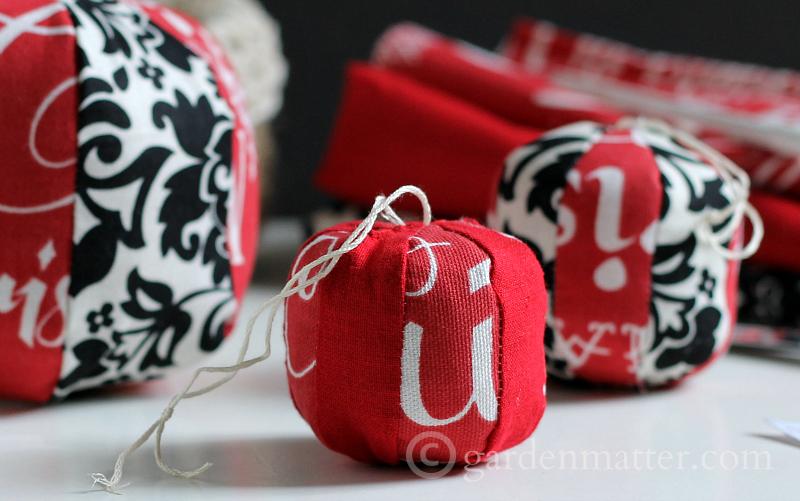
How fun are these? I plan on making several and hanging them on our tree this year.

I also think they would be super cute tied to a package for added decoration and an extra gift.


DIY Mini Pouf Ornament Tutorial
Equipment
- Sewing needle and thread
Materials
- Two complimentary cotton fabrics
- Polyfill or other soft filler
- Embroidery thread or thin ribbon
- Pattern template
Instructions
- Draw the template of your choice on some stiff paper. Trace onto your fabric.
- Cut 4 pieces of each fabric, a total of eight.
- With right sides together, join one piece of each fabric to the opposite.
- Sew along one side, pivoting at the corners.
- Take two pieces, with right sides together, and sew along one side again.
- Turn one piece inside out and nest it into the other so that the right sides are together.
- Pin, matching seams, and corners.
- Sew together leaving a small 1.5 inch opening at one of the seams.
- Turn right side out and stuff with poly-fil or other stuffing material.
- Hand stitch the opening closed.
- Sew a loop of embroidery thread at the top to hang.
Erlene
I made an owl ornament very similar to this for my daughter's teacher. These pouf ornaments are so cute and fun to make too. Thanks for being part of the 2015 ornament exchange!
Patti
Thanks Erlene,
You did a great job coordinating. I know it had to take so much of your time.
Thank you,
Patti
Gabby
I love this Patti! I will see you at the Link Party!
Patti
Thanks Gabby!
Amy Patterson
Love the ornament Patty. It seems like that it would be really hard to make? Is it.
Patti
Hi Amy,
It's really not that hard to make. Just a lot of steps. Of course, I am lacking in patience so that's always an issue but it really wasn't that difficult overall. I definitely recommend trying it. I did end up making one that was a little more rustic and will send both to you sometime this week.
Have a good one,
Patti